Tuesday 17 December 2013

MMC 88: Christmas Greetings Reindeer

Merry Monday's challenge this week is to create a Christmas card with an animal on it. I decided to make a reindeer with my owl punch! I love that the punch can create so many other things.


stamps: Grateful Greetings (retired)
ink: garden green
paper: Tree Trimmings dsp, real red, crumb cake, sorft suede, black, white and very vanilla cardstock, red glimmer paper
tools: decorative label punch, owl punch, 1/2" circle punch, sponge daubers


I made it so that my reindeer is holding up the sign. Isn't he cute? The card itself is kept simple with some pieces of retired Christmas paper applied "randomly." 

I'll keep it short and sweet...because December is, well, December. 

Christmas sometimes feels as though it starts Dec 1st, and it ends sometime in January... friends in from out of town, pot luck parties, exchanging gifts, office parties, relatives, baking, decorating, snow storms, shoveling, Christmas crafting, and then trying to fit December birthdays into it all!? 

May the madness of Christmas let you stop every now and then to breathe!

Thursday 12 December 2013

CCC 017: Ribbon Trees

I saw the "Oh, Christmas Tree!" challenge on Catherine and Cathy Create this week and thought it would be the perfect opportunity to try making the Ribbon Tree. It's made from scrap pieces of left over ribbon. Such a crazy cute idea, and what fun it is to put all these little scraps to use!


stamps: berry christmas, northern hearts
ink: craft white, versamark
paper: real red and garden green cardstock, champagne glimmer paper
tools: sewing machine, large star punch, 1/2" circle punch
extras: white embossing powder, ribbon scraps

I ended up making a number of them, but have entered the above one in the challenge as it seems to be my favorite of the bunch. 
Here are some of the others that this challenge inspired in me...


Aside from feeling like the 5 year old in me created them, the adult in me loves their quaint charm.

We had a tree trimming family get-together and served one of my most favorite dishes ever...Swiss Cheese FONDUE!!!! Let me share some delicious pictures.


Lastly, here is a pic of the tree that we trimmed together. This year we have the addition of the little train from Aaron. So cute!


Hope your Christmas preparations are going well!

Friday 1 November 2013

CFC 119 & SR 200: Greeting Card Witch Tag


I decided to make some Halloween tags, and this is the only one I managed to get pictures of before they disappeared. I decided to use Clear embossing powder for my greeting so I could play along with the CAS-ual Fridays challenge


Stamps: Greeting Card Kids and Grateful Greetings
Paper: Wicked Fun DSP and Whisper White cardstock
Ink: Razzleberry and Versamark
Tools: Heatgun, Pinking Hearts border punch
Extras: Clear embossing powder, Razzleberry polka dot ribbon, hemp twine, kraft reinforcer

My tag looks strangely large at this angle, but is being propped up by a candy bag of black licorice cats! 


Aren't they cute?

Here is a close-up of my clear embossing...


The message reads: "Trick or Treat! Scary and Sweet!" Then, I used "Goblin Greetings" in Razzleberry on the back.

Stampin Royalty's challenge this week is "Anything Goes!" so I think this qualifies. Happy 200th Challenge celebration.

Wishing you a Happy Halloween!

Sunday 20 October 2013

CTS 50: Four Seasons

This is the first time I have inked this stamp up, and I've had it way too long. I'm a bird fanatic and must say this little bird is soOo cute in person. I cannot believe I haven't used him yet, and there are 3 other seasons for me to look forward to using!


Stamps: Four Seasons, Grateful Greetings
Ink: More Mustard, Cajun Craze, Chocolate Chip
Paper: Ivory Naturals and Crumb Cake cardstock
Tools: Large scallop punch, 1" circle punch, sponge daubers, 
Extras: 1 1/4" striped grosgrain in Chocolate Chip, orange glitter

I thought this would be the perfect stamp set for this week's CAS(E) this Sketch challenge. It's not entirely obvious in the picture but I added some random orange glitter to the leaves. Here's a closer view of my birdie...


I sponged the edges of the scallop with chocolate chip. After inking up the stamp in More Mustard, I then dragged my Cajun Craze marker over it randomly. Then colored my bird and branch.


Thanks for checking me out! Happy Fall to you!

Wednesday 16 October 2013

SUO 81 & CFC 117: Pheasant Love

Although Thanksgiving in Canada has already passed, I think I'm still under the umbrella for the American Thanksgiving! Why is it that I always am more inspired to create cards for an holiday after the fact? Not sure, but I still use that inspiration to push out a few more cards.

I thought this pheasant of mine would make some nice cards that had more of a masculine look, as the SUO challenge this week suggested. I also incorporated some faux stitching in line with the challenge over at CAS-ual Fridays. I was trying to stick to one layer.

(I had also incorporated the sketch at Freshly Made Sketches, but missed the deadline, lol...oopss!)


The first of my birds is embossed with not silver but pewter embossing powder. It turns out like a bit of a tarnished silver despite how silvery it looks in the picture below.


Stamps: Teeny Tiny Wishes, Autumn Days
Ink: Versamark, Early Espresso
Paper: Textured Very Vanilla cardstock
Tools: Embossing heat tool, stamp-ma-jig
Extras: Pewter embossing powder

For the card in Crushed Curry cardstock I chose to use a mix of both gold and Early Espresso embossing powders. 


Stamps: Teeny Tiny Wishes, Autumn Days
Ink: Versamark, Early Espresso
Paper: Crushed Curry cardstock
Tools: Embossing heat tool, stamp-ma-jig
Extras: Gold and Early Esprsso embossing powder


On my last bird I used all gold, and chose to color in my birds feather's in Garden Green and Cajun Craze. As you can see, I ended up distressing the borders and mounting it on Crushed Curry also.


Stamps: Teeny Tiny Wishes, Autumn Days
Ink: Versamark, Early Espresso, Garden Green and Cajun Craze 
Paper: Crushed Curry andTextured Very Vanilla cardstock
Tools: Embossing heat tool, stamp-ma-jig
Extras: Gold embossing powder

Happy Thanksgiving!


Saturday 14 September 2013

Thanks to the Hand Stamped Sentiments design team for choosing my card in the top 3! 

You must go and check out all the genius designs everybody else came up with:

Click here to check them all out!


Have a great weekend!


Wednesday 4 September 2013

SUOC 78: Upcycled Vintage Frame

The SUO Challenge this week is all about ribbons and bows! In moving my craft room's location recently, I found myself going through my stash of embellishments, and  uncovered a lot of reasons to be playing with ribbons and bows.

I found this wooden frame at a thrift store and decorated it with some flowers and other embellishments. It already had a lovely crackle finish, so I only added to and updated the center portion with a whole host of different materials. 


Stamps: Lovely Little Labels, You're a Gem
Ink: Cherry Cobler, Soft Suede
Paper: White Naturals and Ivory Naturals cardstock, corrugated cardboard
Tools: Fun Flowers die, glue gun, mini scallop punch
Extras: mini library clips, vintage trinkets, ribbon sliders, antique brads, other retired hardware, twill tape and natural trim ribbon, corduroy buttons, linen thread, antique tags


I covered the background with an off-white burlap material, and layered the flowers on top. 


This is a project that had been in the back of my mind for awhile but I could never seem to commit to certain colors. I stumbled upon this frame in the second hand store, and found a fun way to re-purpose it with my stash of embellishments.


Oh those Fun Flowers are addictive to play with! So many possible combinations!

Hope you had a great long weekend!

Friday 30 August 2013

HSSC 167: Vintage Halloween


I really liked the sketch featured at Hand Stamped Sentiments this week, but I seem to have flipped it over on its side and brought the circle on top of the fishtails. Regardless, love the inspiration. I had also browsed through my previous years' Halloween cards and came across This One. I thought I'd try to recreate it with a more vintage feel, some different colors. This is what I came up with...


Ink: Black Stazon, Burgundy, Razzleberry, Mustard, Pumpkin Pie, Espresso, Sand 
Paper: River Rock, More Mustard, Espresso cardstock, Watercolor paper, First Edition dsp
Tools: Simply Scored tool, Color spritzer, blender pens
Extras: Pumpkin Pie glitter brad, Victoria crochet trim, pearls, linen thread

Here is the detail I made using the Score It! along the side of the card and then I spritzed it with the color spritzer and River Rock marker. Sorry it's a little blurry, I think it's actually more visible in the above picture :s


Detail of watercolor section...


I think that River Rock, More Mustard and Bravo Burgundy make a great color combo!


Oh how I love those Greeting Card Kids stamp set! I really try to make a new card each year with that little witch atop her pumpkin. Hope you like!

Saturday 24 August 2013

Trio in Cherry

Hello! Oh, where have I been? Well moving is the latest thing...but amidst everything I have been creating here and there. Boy I can't wait until things are settled in! Regardless, I've got a number of projects to share with you. I've seen others taking traditional paper crafting and mixing it with digital scrapbooking, and couldn't wait to try it. Here is one of the projects I've done that falls under the Hybrid umbrella.


Digital Ink: Lucky Limeade, Cherry Cobbler, Early Espresso
Paper: Whisper White & Cherry Cobbler cardstock, Christmaslane dsp
Tools: My Digital Studio
Extras: gold brad


Here are some close up details of the Hybrid card...


I find this particular dsp pattern hard to use as a background because it's so busy but it seems to work well here.


Hope you have a good day!

Sunday 7 April 2013

CD release "Time"

A good friend of mine, Aaron Bailey, is a very talented performing artist. He is releasing his new debut CD entitled Time. He needed something a little different than the usual printed invites for special friends and/or media he wished to invite to the CD release performance. So, I tried making up a hand made card for him at his request. 


I used his album cover as a starting point and this is what I came up with...


Stamps: Clockworks, Rough Type
Ink: Versamark, Illuminate pad, Whisper White craft pad
Paper: Whisper White, Cherry Cobbler, and Black cardstock
Tools: distressor tool, 1 1/4" circle punch, 1/2" circle punch, heat tool, dimensionals, glue dots
Extras: Cherry Cobbler, Clear, and Silver embossing powders, silver brad


The face of the clock is popped up on dimensionals and distressed. Each letter is punched and distressed, then adhered with a glue dot. The clock itself and the largest gear are embosssed in silver. The clock face is in Whisper White craft ink. The gear with the cross through it is stamped with the new Illuminate pad, the smallest gear is in clear embossing powder.


For the insert, I used a font that matched the old typewriter font on the front of the card. I had some cute packages done up with the card laying atop the CD and wrapped with red ribbon, like a gift for select media persons to receive. Of course, I took pictures of this but cannot find them anywhere!?


Aaron Bailey's CD release performance details:
(insert reads)


You are invited to experience a night
with local artist, Aaron Bailey.
When:
April 7, 2013 from 7:30 to 9:30
Where:
John L. Haar Theatre
10045-156 St. Edmonton, AB

Aaron invites you to experience a live 
performance of his original songs in the 
company of his seven-piece band, 
in honour of his debut album, “Time.”
You may have previously seen Aaron 
perform musical requests at the dueling 
piano bar, The Red Piano, in Edmonton. 
However, on this night, Aaron is excited 
to perform his original material for you!
Come out for a night of instantly catchy
pop-rock songs with melancholy yet
inspiring lyrics that elicit hope, comfort, 
and change.


Hope you can make it! See you there!


Tickets can be purchased at the door or from Tix on the Square


Wednesday 20 March 2013

Merry March

I'm terribly behind...sigh. Valentime's, St. Patrick's, a whirlwind of holidays and I'm still stuck on Christmas. Well, at least I'll still be able to be in sync with Merry Monday. Maybe it's because I always start my Christmas cards a little late that I continue to make them into the new year, but every year it's the same. If I were smart, I'd continue on throughout the year as the folk as Merry Monday do!


Stamps: Frosty Friends, Many Merry Messages
Ink: Early Espresso, Versamark
Paper: Early Espresso and Whisper White cardstock
Tools: Apothecary Accents Framelits die
Extras: White embossing powder, rhinestone brads, Christmas Lane die cut stickers (retired)

If you're wondering why I'm taking pictures of my cards on the floor, well it's because the light there is the best. I've tried them on the table and it's just not the same, it seems to stream through on the floor better than anywhere else near the patio door.

Happy Post St Paddy's Day!

Wednesday 16 January 2013

Baby Shower Projects

Well, it's been far too long! I got caught up in the holidays, baby showers and baby birth, moving my mother and a really nasty cold over xmas. Anyways, i'm here to share some pics from my friend's baby shower (finally)!

My best friend, Kim, is Vietnamese so her Momma cooked up some insanely delicious food! People went a little nuts over the homemade spring rolls!!! But they are delicious so we get it : D

Here is my banner below. We attached the first part above the mantle...

Stamps: Fox & Friends
Ink: Basic Grey
Paper: Daffodil Delight, Basic Grey, Whisper White, Build a Bear pawsitively prints I (so saffron polka dot paper on the grey pennants)
Tools: Perfect Pennants die (new one), Bigz XL Pennant die (old one), Serif Essentials Alphabet dies, Rosette die, XL scallop circle punch, 1 3/4" circle punch, Circles #2 die, 3/4" punch
Extras: Daffodil Delight satin ribbon

and the second part hung from the mantle itself. As you can see the colours are Daffodil Delight, Basic Grey, and white. I used the stamp set Fox & Friends throughout. My grey polka dots were made from 3/4" circles punched from grey cardstock and applied at random with glue dots.

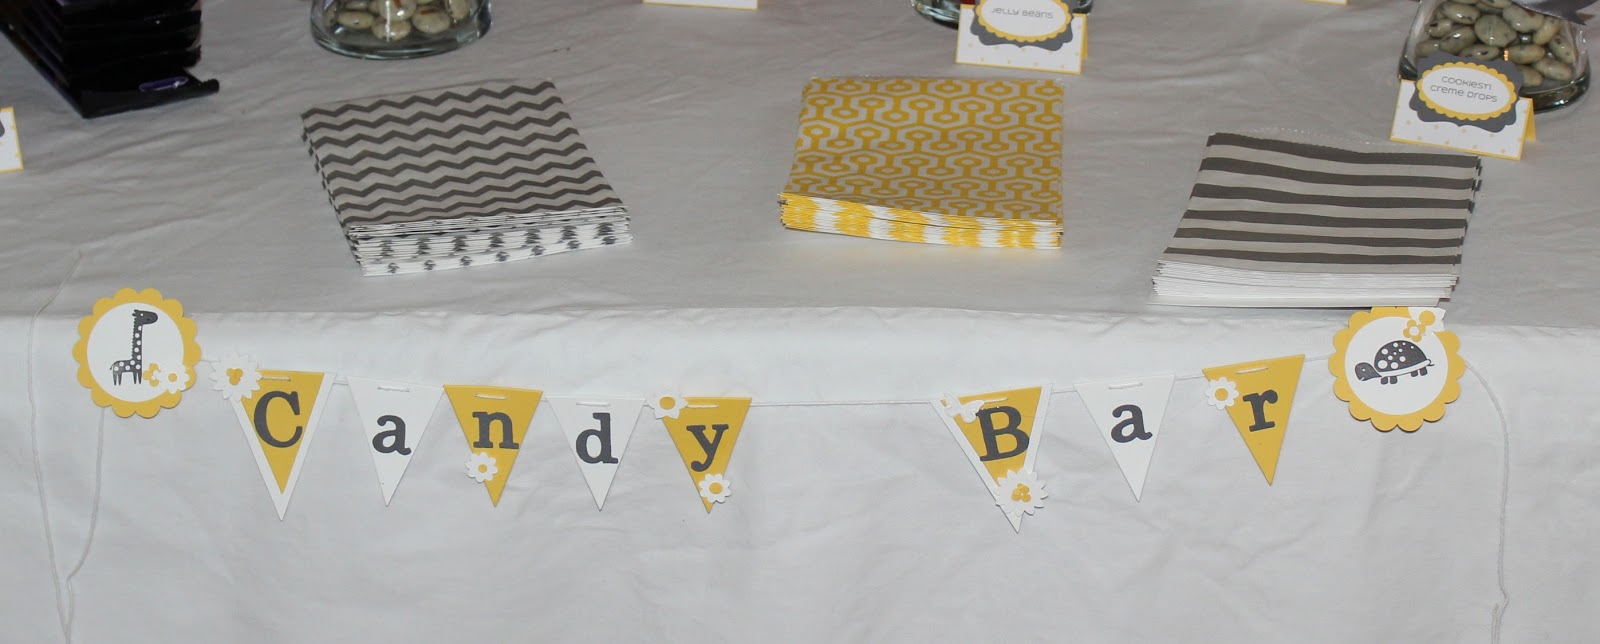
We also had a candy bar. Yay! Kim and I had a blast just going and buying the candy. We both agreed that it was the most fun we'd had in a long time. We used to work together in a chocolate shop, so our days of delighting in candy and treats together go waaaay back. As you can see, she didn't skimp!


Stamps: Fox & Friends
Ink: Basic Grey
Paper: Daffodil Delight, Basic Grey, Whisper White
Tools: Perfect Pennants die (new one),Timeless Type sizzlits dies, XL scallop circle punch,,1 3/4" circle punch, Boho Blossoms punch
Extras: White bakers twine


I made a mini banner for the candy bar, and little label stands to identify each type of candy. There are little daisies added to the banner that I made by using the Boho punch. 

The candy shown here are the Hershey's Cookies and Creme drops; Kim's favorite!


Stamps: none
Ink: none (I printed the candy names off the computer)
Paper: Daffodil Delight, Basic Grey, Whisper White, Build a Bear pawsitively prints I (so saffron polka dot paper) 
Tools: Decorative punch, scallop oval punch, scallop circle punch


Here is a picture of the cupcake picks I made. The cupcakes were homemade too by our friend Dominique (who basically organized the whole shebang.) Check out the punch with floating duckies. So cute!


Stamps: Fox & Friends, Tiny tags
Ink: Basic Grey, Daffodil Delight
Paper: Daffodil Delight, Basic Grey, Whisper White
Tools: XL scallop circle punch, 1 3/4" circle punch, 1 1/4" circle punch, 1" circle punch
Extras: Daffodil Delight buttons, bakers twine

So here is the food table!!! Homemade spring rolls, salad rolls, papaya salad with shrimp, noodle dishes...oh my!


A close-up of one of the menu cards. We put the Vietnamese name first, and the English underneath. At the shower they announced they were having a boy. The fox was Kim's favorite stamp of them all, so I went heavy on the fox.


Pretty yellow flower puffs Dominique made that we hung around the food table.


This is a picture of the wall of balloons that was above the spot where the gifts were opened. Cool idea eh? I found it on pinterest. Doesn't it sort of look like bubbles? 


Dominique did such a great job of organizing everything. Kim's mom is a master chef...i'm seriously so jealous that she got to grow up on her Momma's cooking. I was thrilled to be allowed to create some stuff for such an important event in our lives.

I love how events like this bring everybody together, and you get to see all those people you just don't normally see on an everyday basis. It makes it so special to reconnect again and to be able to all share the excitement together. It was such great fun!