Monday, 20 August 2012

I do day

Here is the other card that I made for my friend's wedding. Well, I made it for a friend who was also attending the wedding. 


Stamps: Word Play
Ink: Basic Black
Paper: Whisper White cardstock, non-su iridescent vellum paper
Tools: Framed tulips and polka dot embossing folders, labels collection framelits die
Extras: organza ribbon, rhinestone

Here is a closer view of the ribbon treatment and the perfect place for a rhinestone on top of the ring.


This card is a perfect example of what the Big Shot can do, since most of it cannot be done without it.


Hope your finding ways to enjoy this heat wave, phew!

Tuesday, 7 August 2012

If there isn't a better way to wake up!?! It's when I wake up to find out that my Blushing Bouquet was in the top 3 at SUO challenges. I only rather recently discovered their challenges and quite enjoy a place that celebrates Stampin Up! products, regardless of whether they are retired or not.


The other entries were all so lovely, you must check them all out. I discover the coolest blogs I never knew existed whenever I check out the work of other challenge entries. So many creative ways of using ribbon, colour, layouts, I actually do get lost in them for hours.

Have a great day and I hope something unexpected pops up into your life and gives you a real smile today too!


Sunday, 29 July 2012

SUO 50 & PPA 106: Blushing Bouquet

I have been working on this little project for awhile, fiddling with it here and there in between making cards, but I finally finished it! I had an intended recipient I was going to give it to but their birthday came and went and I hadn't finished the project. It just so happens that my project follows the guidelines for The Paper Players' neat little challenge:


Isn't that a fun idea for a challenge?! I love it! My project falls under the bottom line of the grid: Floral, Ribbon, and Punches.
I also am submitting my little bouquet to the Stampin Up Only's challenge which asks us to use either buttons or brads in our project. Mine uses some sparkly Blushing Bride brads, can you find them?


Stamps: Flower Fest, Tiny Tags, A to Z
Ink: Blushing Bride, Regal Rose, Versamark
Paper: Blushing Bride, Regal Rose, Pear Pizzaz, Very Vanilla, Naturals Ivory cardstock and First Editions dsp
Tools: Blossom Petals builder punch, Boho Blossoms punch, Fancy Flower punch, Jewelry Tag punch, 5 Petal Flower punch, Blossom Bouquet Triple Layer punch, 1/3" circle punch, Itty bitty punch pack, ¾” circle punch, sticky strip, and sticky sheets, dimensionals, iridescent Ice embossing powder, heat gun, snail, glue dots, sponge daubers, Crystal Effects
Extras: pearls, Blushing Bride poly-stitch ribbon, Blushing Bride glimmer brads, vintage trinkets
*non-SU product: styrofoam ball, circular wooden box, straight pins


A little iridescent ice to make it sparkle. The A to Z stamp is used for this sparkle to mimic the words on the other flowers but this picture is too blurry to see it.


Trying out fun things with the Blossom Bouquet Triple Layer Punch (that is now retired...sigh)


Maybe I'll just hang onto it and give it to her next year. First Edition newsprint is by far my favorite paper to work with and I'm so glad to see it in the catalog next year. I have to force myself to work with other papers.


Thanks for visiting. I hope your summer is keeping you nice and busy (but in a good way), just as mine is!

Wednesday, 27 June 2012

For the Newlyweds

Well, the wedding is over and I've had time to recuperate. Now, I can finally share my card with you.


Stamps: Always Elegant, Teeny Tiny Wishes, Whimsical Words
Ink: Versamark, Crumb Cake, Soft Suede
Paper: Very Vanilla cardstock
Tools: Flower Fusion die, Heat gun, glue dots, dimensionals
Extras: Iridescent Ice embossing powder, pearls

This card is difficult to capture with the camera, but I tried. I used iridescent embossing powder for my central stamp. I really wanted to have the border to my front panel match my central stamp exactly, so I stamped versamark all over the edge of the border and used iridescent ice once again.


When tilted into the light the image shines and yet disappears a bit, but if tilted back, the image becomes more clear again.


Using the flower fusion die on each corner brings dimension and gives a great excuse for more pearls!


I decided to use the same image on the inside but in a more visible way with Soft Suede ink. Using the versamark pen I added a few sparkles to the word "heart."


It required a bit of a bigger envelope but so what! There is no better excuse to embellish than a wedding.


We had a great time. I love weddings where you know a lot of people and they're all great people. So much fun! 


I rarely create cards all in one colour. It was kinda neat to make this one. Using the template provided from Sketch Frenzy Friday, I decided to make the large stamp as the focal point in front and centre.


Friday, 22 June 2012

SUO47: Mushroom Sparkle and Frills

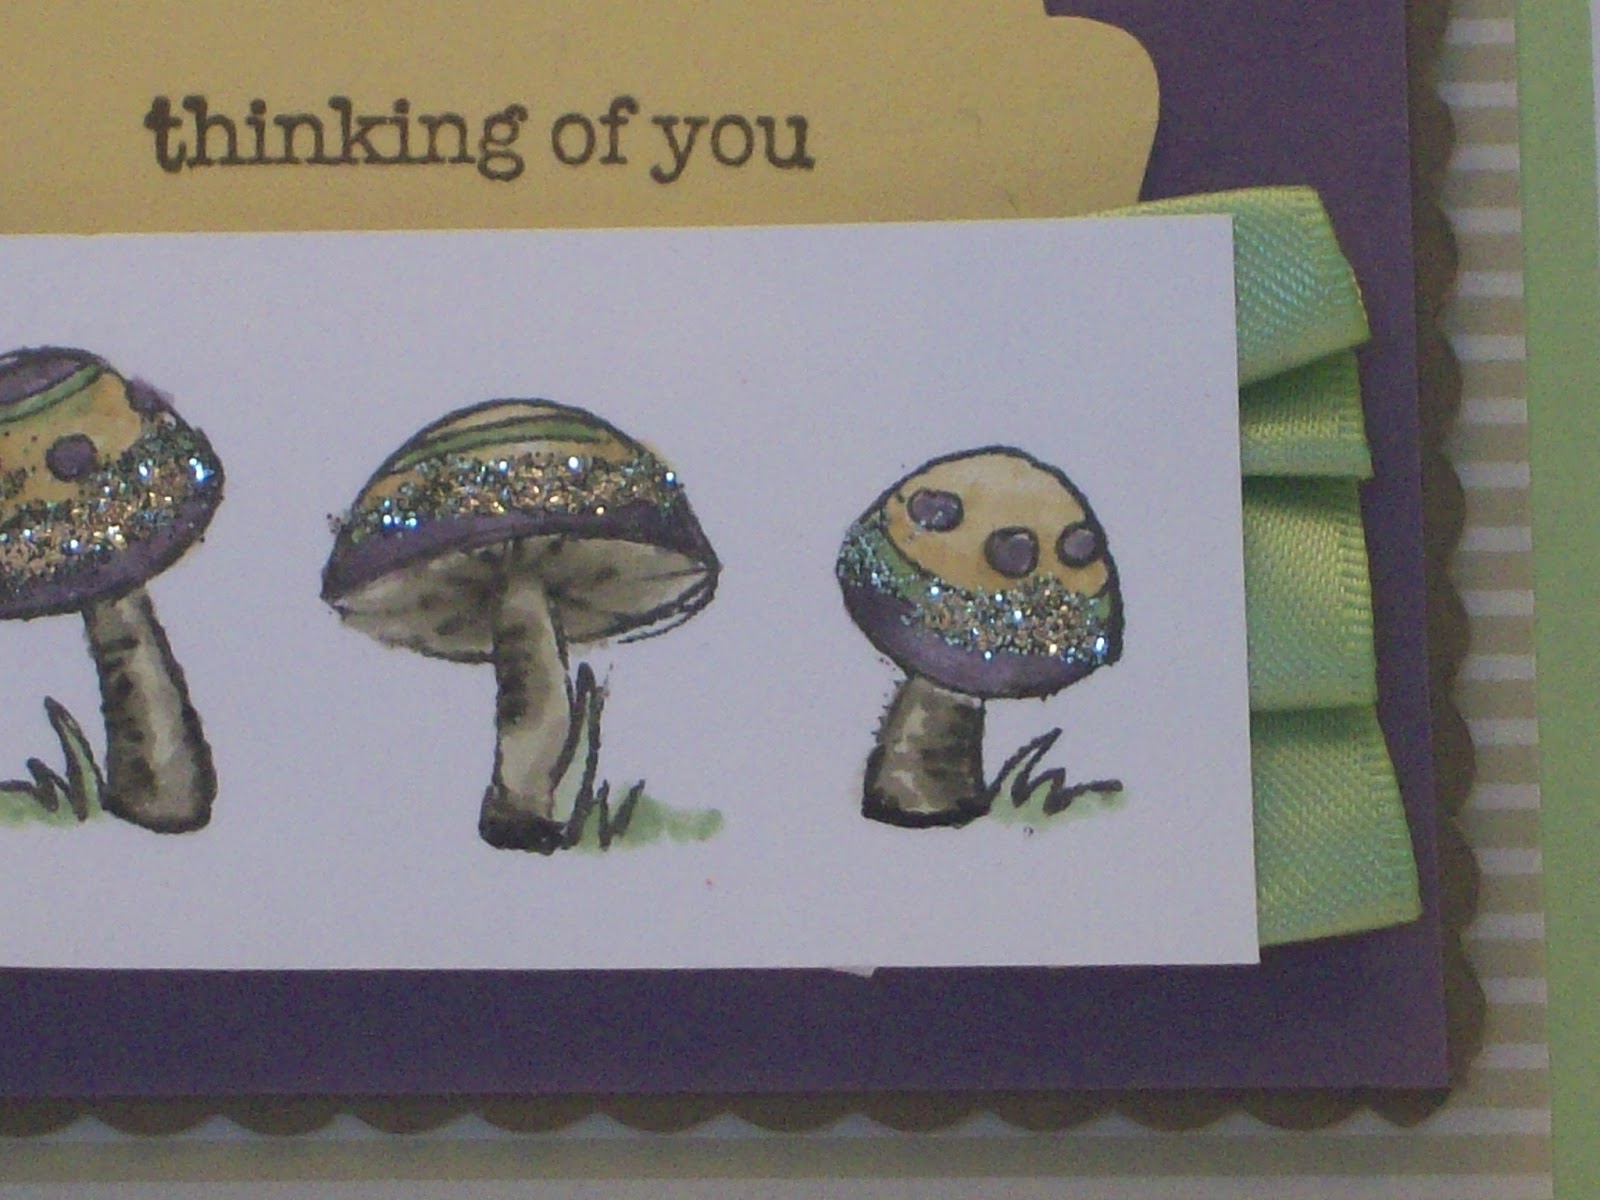
How about a little mushroom sparkle to brighten your day? It sure brightened mine. They are so cute I couldn't help but smile at them. Can you guess where they are from?


Stamps: Everybunny, Teeny Tiny Wishes
Ink: Soft Suede, Perfect lum, Certainly Celery, So Saffron and Early Espresso
Paper: Certainly Celery, Soft Suede, Perfect Plum, So Saffron, Whisper White cardstock, Certainly Celery dsp
Tools: Decorative Label punch, Scallop Ribbon punch,, sticky strip, dimensionals, blender pens
Extras: Certainly Celery satin ribbon, champagne glitter

In keeping with the theme over at SUO's challenge, I created a ruffle with the sating ribbon and some sticky strip to either side of the mushroom panel.


Although it may be simple in appearance, those little mushrooms took some effort to separate. In the original stamp they all sit in a cluster together. See...

Everybunny Stamp Set - by Stampin' Up!
Here's a close up of my mushrooms with their glitter. They were great fun to colour.


I came across some real little mushrooms in the parents' backyard on the weekend. I didn't even see them in the long grass and almost stepped on them. They were cute little white ones. So cute!

Sunday, 10 June 2012

Fast and Fab

June is a busy month! I've had to attend birthdays and a bridal shower, and then I have a wedding coming next weekend. Plus the stamp room is moving and is pretty much a big mess. So, I thought I would share a card I made for a girlfriend's birthday with you.


Stamps: Fast & Fabulous, Whimsical Words (both retired)
Ink: Basic Grey, Sahara Sand, white pencil crayon
Paper: Marina mist cardstock
Tools: Crystal Effects & a toothpick
Extras: white baker's twine

It's so simple but still lovely. It measures 3" x 6".


I stamped the flower in Basic Grey onto the cardstock. I then did some highlighting with a white pencil crayon, to the flowers and greeting.


Next, I added Crystal Effects to the flowers and just slightly to the word "thought" in the greeting, spreading it around with a toothpick. What is Crystal Effects?

Crystal Effects - by Stampin' Up!

It gives a glossy effect to an image and makes it somewhat 3D. In this case, it made the cardstock a deeper blue around the edges of the flower. I did not use any blue on the card, the blue on the card is from the Crystal Effects deepening the colour of the cardstock. I let it dry overnight.


Finally, once dried, I went around the edges of the flowers with a Sahara Sand marker, to soften and shadow it further.

I think I need to make some more, but maybe try a quicker version and use clear embossing.

I'm off to get ready for this wedding. I need to find some shoes, oh and make the card!

Hope your June is filled with fun activities too!


Tuesday, 29 May 2012

Clean and Classy

Hi there!
Sorry for the long gap in posting. I have had a whole lot going on...whew...and it's not all done. To be honest, I haven't had much time for stamping, other than the work I was doing on my Artisan Design Team entries. Their announcement stating that the Artisan Award now allowed even small-time demonstrators to apply, inspired me to send in some creations. I'll share them you after the winners have been announced.

I'd like to share with you a card I made last year but that I still love! I've been going through my stash because my entire stamp room is in the process of being moved and renovated so please bear with me. Sigh. It'll be great when it's done, let's just focus on that. : D

This card so perfectly clean and classy!


Stamps: Engraved Greetings (retired)
Ink: Basic Black
Paper: Basic Grey, Not Quite Navy, Cherry Cobbler, and Whisper White cardstock
Tools: corner punch, spiral punch, 1/16" hole punch
Extras: big designer star brad (retired)


I don't think I will ever be able to give this set away. LooOOOoooove that vintage newsprint feel!


I used my stamp-a-majig to put the finial on the the top and bottom edge of the card's insert. 


Well, that's my little show-and-tell episode for today. A blast from the past but sometimes great cards never go out of style.

Hope you're enjoying whatever new projects you've decided to take on lately!