Thursday, 27 February 2014

Post-Valentine post

I finally ordered the Hearts Collection Framelits Dies and had some fun playing with my new toys. Here are some post-Valentine pics...


Stamps: A Round Array
Ink: Regal Rose
Paper: Regal Rose, Sahara Sand dsp, Whisper White and Sahara Sand cardstock
Tools: Pinking hearts border punch, 1 3/4" circle punch, 7/8" scallop circle punch, Hearts Collection Framelits
Extras: Rhinestone


Stamps: none
Ink: Regal Rose (sponging on flower)
Paper: Vanilla Naturals, Pink Pirouette, Regal Rose and Sahara Sand cardstock, Regal Rose dsp, scallop trim from Princess Party Pack
Tools:  Hearts Collection Framelits Dies
Extras: Chat Room rub-ons, vanilla 1/4" grosgrain, Very Vintage button


Stamps: You are Loved
Ink: Regal Rose, Night of Navy
Paper: Pink Pirouette and Night of Navy cardstock, Regal Rose scallop trim from Princess Party Pack
Tools: Hearts Collection Framelits Dies
Extras: Navy Organdy ribbon


Hope your Valentine's was sweet!

Monday, 6 January 2014

Vintage Bejeweled Tree

I got the inspiration for my tree from this pin on Pinterest. I really wanted to create a subdued tree. I'm loving how it sparkles in the light!


Unfortuately, I don't have great pictures as my good camera is being loaned out, so I've only got cell phone pics but here we go...


Lately, this book page base has been something I'm hooked on! So you will see more of it. I modge podged the base with old book pages. 


Then I strung a mix of clear, iridescent, and pearlized beads on wire. Some odd buttons were strung as well as mini jingle bells, onto pieces of wire strung together like garland.


The small circle from Punch Pack and the 3/4" circle punch were used to create the balls on my tree. Champagne and Silver glimmer paper worked great for this.


Happy New Year!


Tuesday, 17 December 2013

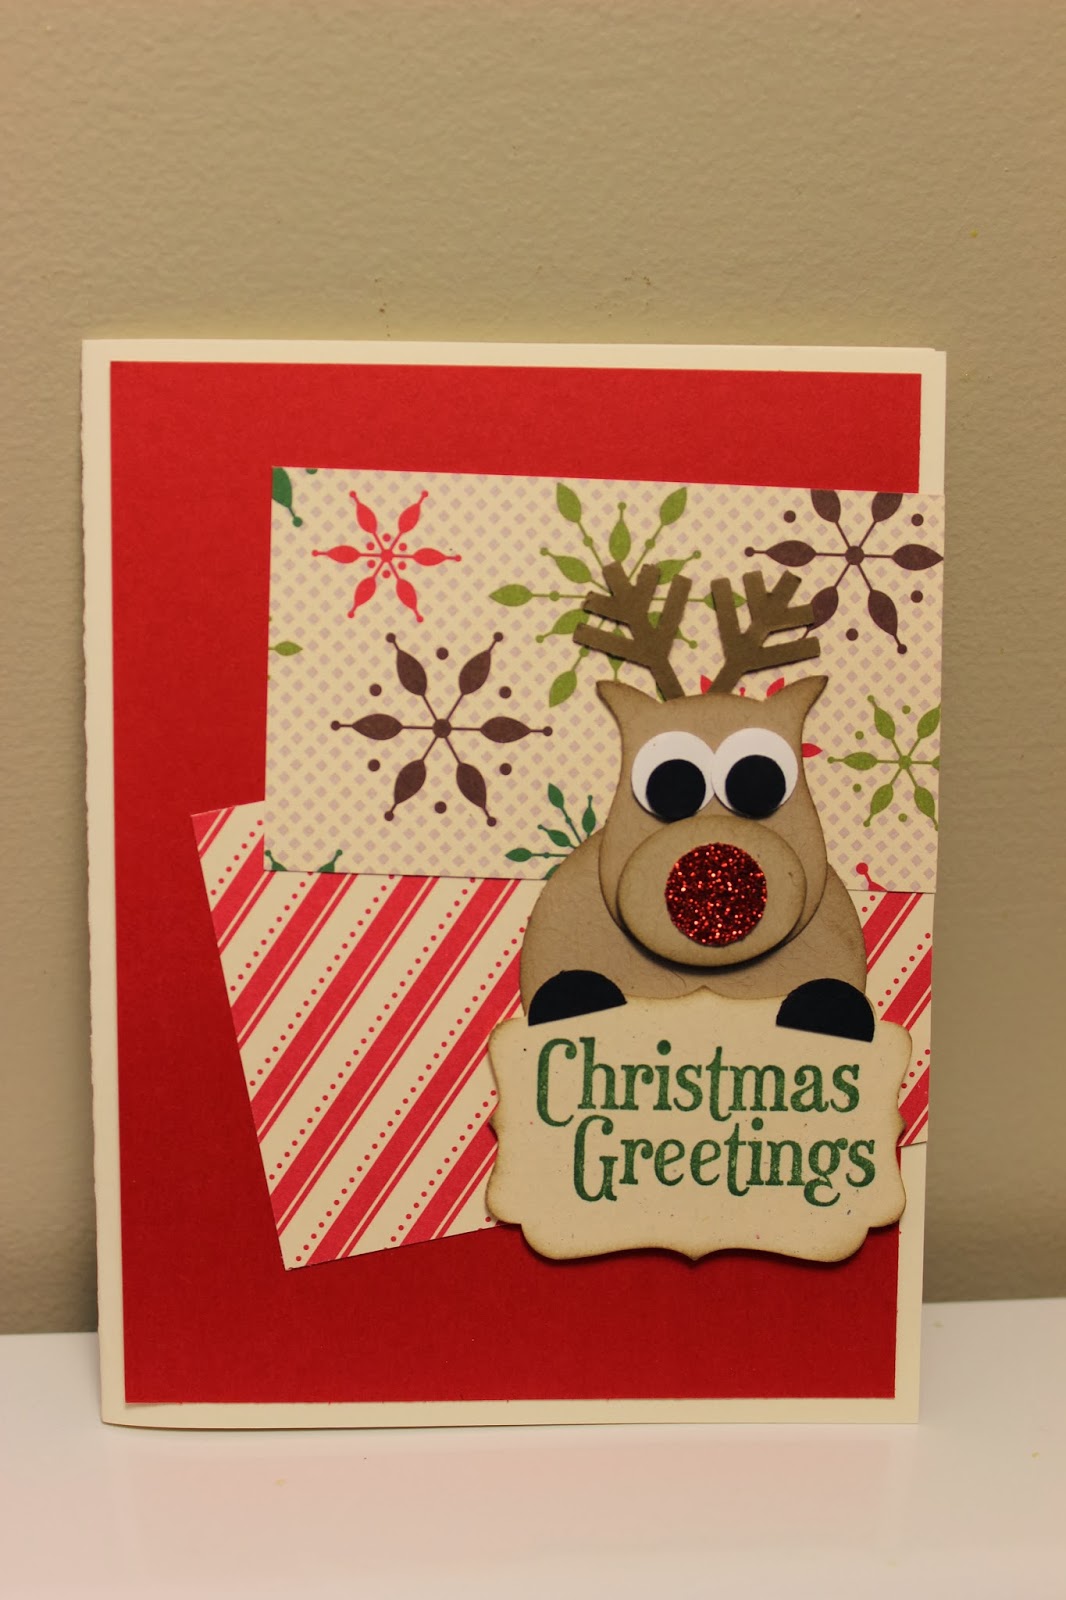
MMC 88: Christmas Greetings Reindeer

Merry Monday's challenge this week is to create a Christmas card with an animal on it. I decided to make a reindeer with my owl punch! I love that the punch can create so many other things.


stamps: Grateful Greetings (retired)
ink: garden green
paper: Tree Trimmings dsp, real red, crumb cake, sorft suede, black, white and very vanilla cardstock, red glimmer paper
tools: decorative label punch, owl punch, 1/2" circle punch, sponge daubers


I made it so that my reindeer is holding up the sign. Isn't he cute? The card itself is kept simple with some pieces of retired Christmas paper applied "randomly." 

I'll keep it short and sweet...because December is, well, December. 

Christmas sometimes feels as though it starts Dec 1st, and it ends sometime in January... friends in from out of town, pot luck parties, exchanging gifts, office parties, relatives, baking, decorating, snow storms, shoveling, Christmas crafting, and then trying to fit December birthdays into it all!? 

May the madness of Christmas let you stop every now and then to breathe!

Thursday, 12 December 2013

CCC 017: Ribbon Trees

I saw the "Oh, Christmas Tree!" challenge on Catherine and Cathy Create this week and thought it would be the perfect opportunity to try making the Ribbon Tree. It's made from scrap pieces of left over ribbon. Such a crazy cute idea, and what fun it is to put all these little scraps to use!


stamps: berry christmas, northern hearts
ink: craft white, versamark
paper: real red and garden green cardstock, champagne glimmer paper
tools: sewing machine, large star punch, 1/2" circle punch
extras: white embossing powder, ribbon scraps

I ended up making a number of them, but have entered the above one in the challenge as it seems to be my favorite of the bunch. 
Here are some of the others that this challenge inspired in me...


Aside from feeling like the 5 year old in me created them, the adult in me loves their quaint charm.

We had a tree trimming family get-together and served one of my most favorite dishes ever...Swiss Cheese FONDUE!!!! Let me share some delicious pictures.


Lastly, here is a pic of the tree that we trimmed together. This year we have the addition of the little train from Aaron. So cute!


Hope your Christmas preparations are going well!

Friday, 1 November 2013

CFC 119 & SR 200: Greeting Card Witch Tag


I decided to make some Halloween tags, and this is the only one I managed to get pictures of before they disappeared. I decided to use Clear embossing powder for my greeting so I could play along with the CAS-ual Fridays challenge. 


Stamps: Greeting Card Kids and Grateful Greetings
Paper: Wicked Fun DSP and Whisper White cardstock
Ink: Razzleberry and Versamark
Tools: Heatgun, Pinking Hearts border punch
Extras: Clear embossing powder, Razzleberry polka dot ribbon, hemp twine, kraft reinforcer

My tag looks strangely large at this angle, but is being propped up by a candy bag of black licorice cats! 


Aren't they cute?

Here is a close-up of my clear embossing...


The message reads: "Trick or Treat! Scary and Sweet!" Then, I used "Goblin Greetings" in Razzleberry on the back.

Stampin Royalty's challenge this week is "Anything Goes!" so I think this qualifies. Happy 200th Challenge celebration.

Wishing you a Happy Halloween!

Sunday, 20 October 2013

CTS 50: Four Seasons

This is the first time I have inked this stamp up, and I've had it way too long. I'm a bird fanatic and must say this little bird is soOo cute in person. I cannot believe I haven't used him yet, and there are 3 other seasons for me to look forward to using!


Stamps: Four Seasons, Grateful Greetings
Ink: More Mustard, Cajun Craze, Chocolate Chip
Paper: Ivory Naturals and Crumb Cake cardstock
Tools: Large scallop punch, 1" circle punch, sponge daubers, 
Extras: 1 1/4" striped grosgrain in Chocolate Chip, orange glitter

I thought this would be the perfect stamp set for this week's CAS(E) this Sketch challenge. It's not entirely obvious in the picture but I added some random orange glitter to the leaves. Here's a closer view of my birdie...


I sponged the edges of the scallop with chocolate chip. After inking up the stamp in More Mustard, I then dragged my Cajun Craze marker over it randomly. Then colored my bird and branch.


Thanks for checking me out! Happy Fall to you!

Wednesday, 16 October 2013

SUO 81 & CFC 117: Pheasant Love

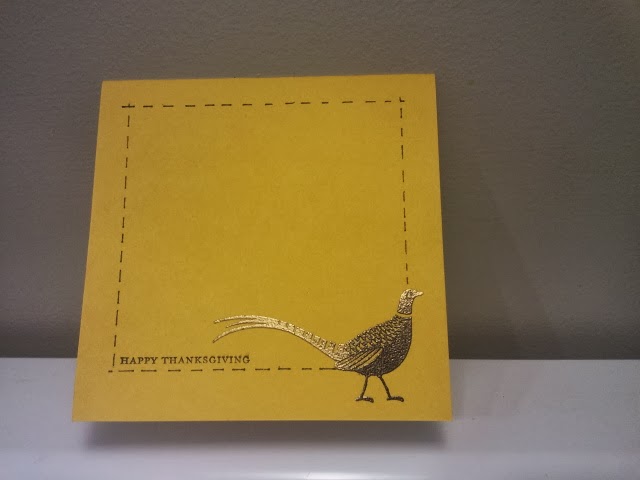
Although Thanksgiving in Canada has already passed, I think I'm still under the umbrella for the American Thanksgiving! Why is it that I always am more inspired to create cards for an holiday after the fact? Not sure, but I still use that inspiration to push out a few more cards.

I thought this pheasant of mine would make some nice cards that had more of a masculine look, as the SUO challenge this week suggested. I also incorporated some faux stitching in line with the challenge over at CAS-ual Fridays. I was trying to stick to one layer.

(I had also incorporated the sketch at Freshly Made Sketches, but missed the deadline, lol...oopss!)


The first of my birds is embossed with not silver but pewter embossing powder. It turns out like a bit of a tarnished silver despite how silvery it looks in the picture below.


Stamps: Teeny Tiny Wishes, Autumn Days
Ink: Versamark, Early Espresso
Paper: Textured Very Vanilla cardstock
Tools: Embossing heat tool, stamp-ma-jig
Extras: Pewter embossing powder

For the card in Crushed Curry cardstock I chose to use a mix of both gold and Early Espresso embossing powders. 


Stamps: Teeny Tiny Wishes, Autumn Days
Ink: Versamark, Early Espresso
Paper: Crushed Curry cardstock
Tools: Embossing heat tool, stamp-ma-jig
Extras: Gold and Early Esprsso embossing powder


On my last bird I used all gold, and chose to color in my birds feather's in Garden Green and Cajun Craze. As you can see, I ended up distressing the borders and mounting it on Crushed Curry also.


Stamps: Teeny Tiny Wishes, Autumn Days
Ink: Versamark, Early Espresso, Garden Green and Cajun Craze 
Paper: Crushed Curry andTextured Very Vanilla cardstock
Tools: Embossing heat tool, stamp-ma-jig
Extras: Gold embossing powder

Happy Thanksgiving!